Headshot posing can be more complicated than you think! It might seem like it would be simple—after all, it’s just head and shoulders. How much could you mess up? In reality, with a photo that close-up, posing matters! Positioning your body, even your feet, makes a difference in the final photo. Do it right, and you’ll look your best.
Headshot posing tips from Berks Headshots head photographer
Feeling overwhelmed with getting a photo that you like of yourself? Don’t worry, I have worked with professionals of all shapes and sizes, and I’m here to help. Here are some tips to help you get the best DIY headshot possible.
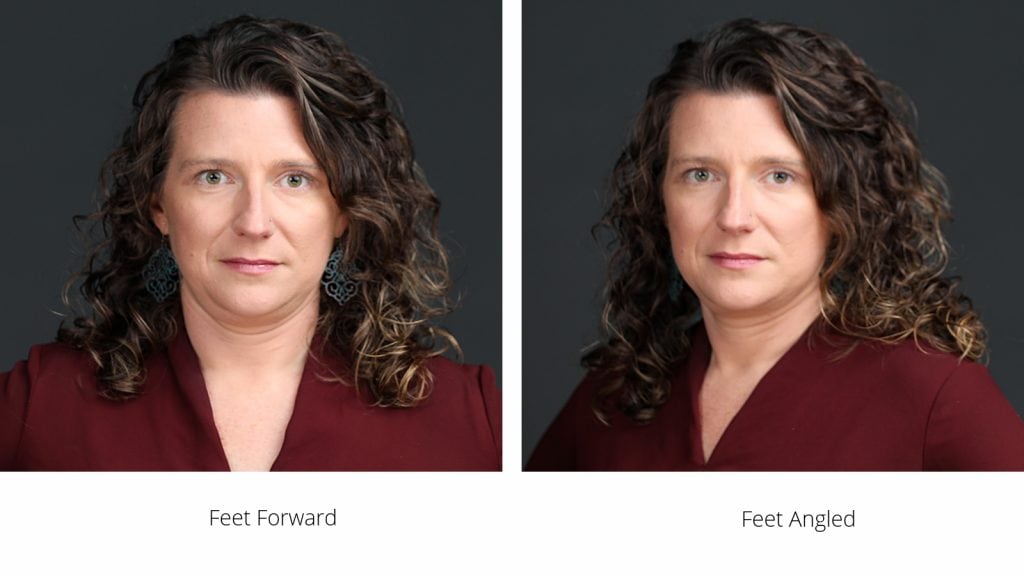
Posing feet for headshots
What? Posing feet for a headshot? Yes! While you won’t see your feet in the final photo, thinking about how they are positioned is the best place to start. Do you have narrow shoulders and want to make them seem broader? Turn your feet so that your toes are pointed toward the camera. Do you want to appear less broad and add more dimension to the photo? Turn your feet, so your toes are pointed at a 45-degree angle away from the camera. Now that you’re there; turn the foot toward the camera so that the toe is pointed back toward the camera, creating an open-body position while still being angled.
Posing shoulders for headshots
Whether you are standing forward, with your toes pointing toward the camera, or at an angle, your shoulders can communicate a standoffish or approachable vibe, depending on how they are positioned. Pay attention to this as you take your photos. The general rule of thumb is that leaning away from the camera will give that standoffish look. Try leaning the shoulder toward the camera slightly down toward the floor. This creates an approachable vibe and can lengthen the look of the neck. Long necks have been considered to be a thing of beauty throughout the history of art and across cultures!

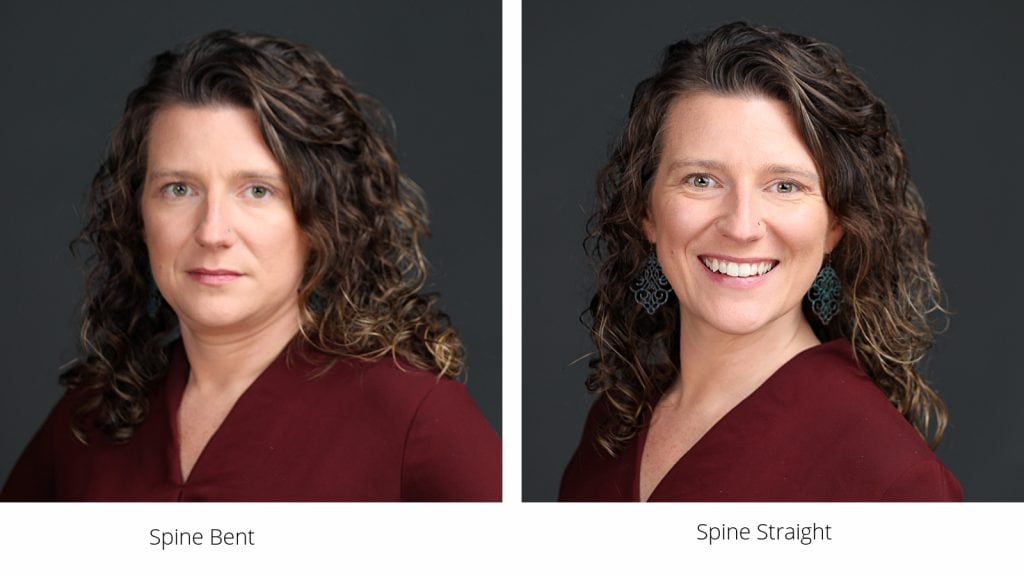
Spine positioning can make or break your final headshot
Make sure whenever you lean toward the camera that you are leaning over your hips in such a way that you are not bending your spine. You don’t want to get the slouchy or tired look that a bent spine communicates. Imagine a string attached to the top of your spine, now imagine it just pulled with a little tug toward the ceiling. There you go! Posture perfection.
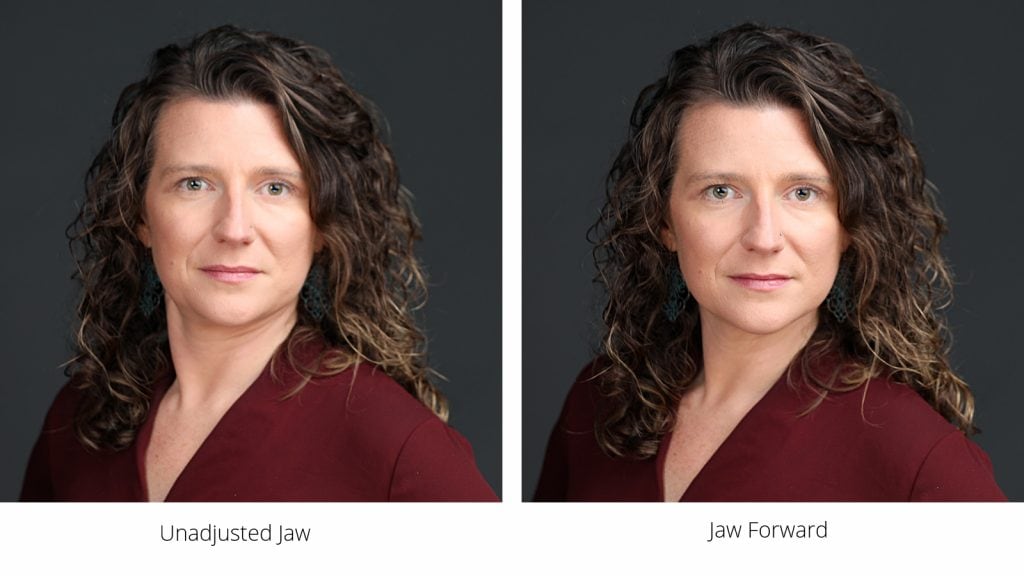
Positioning your jaw for your DIY headshot
Imagine you are a turtle coming out of its shell and stretch your jaw toward the camera an inch or two. Feel awkward? That probably means you are in the correct position! Take one photo before and one after making this subtle move to see the difference. You will notice that your jaw looks more defined, and you’ll get an image that connects more with the viewer because it communicates a look of interest.
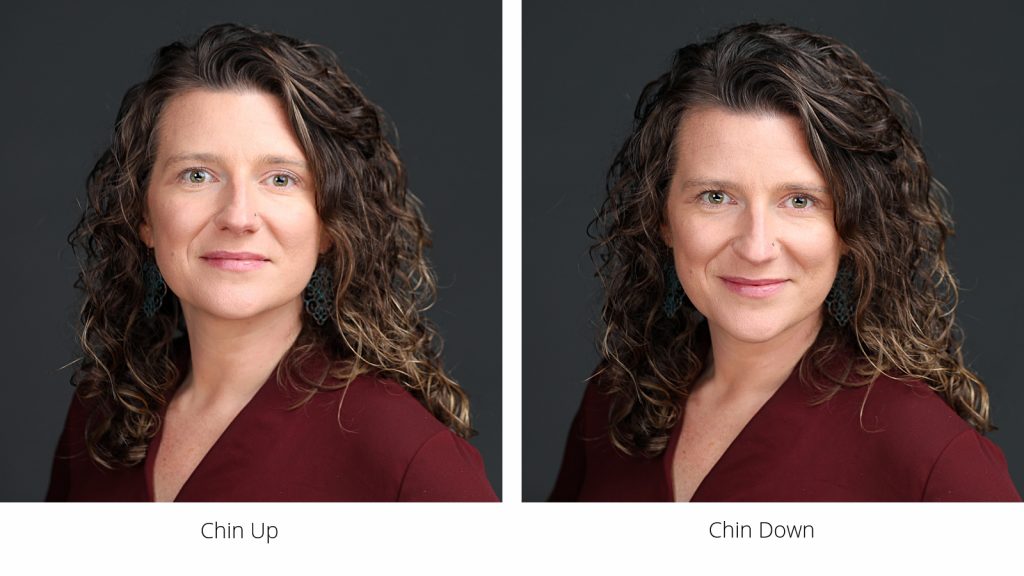
How to tilt your chin for your headshot photo
So now that your jaw is toward the camera, let’s pay attention to your chin. A chin tilted slightly above level communicates confidence. A chin tilted slightly below level gives an approachable and friendly vibe. The message you want to convey is important to consider. On top of that, lowering your chin can open your eyes. Point your chin high and try to look straight ahead, now point your chin downward and try to look straight ahead. Can you feel how that opens your eyes? One more tip, try a shot with your chin swung toward your shoulder. This is one of my favorite chin poses, it lengthens and slims the neck.
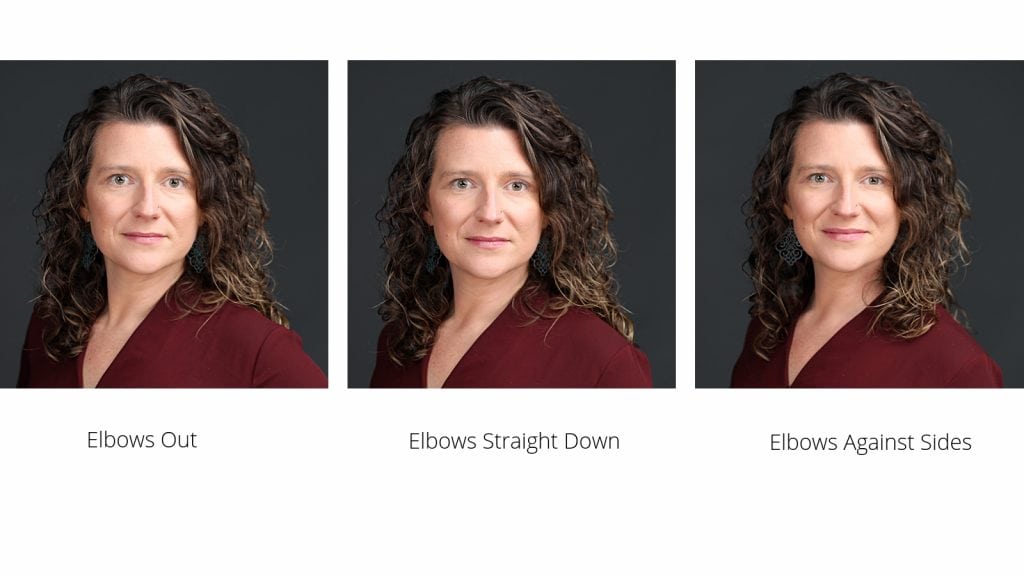
Where elbows belong in headshot posing
If you zoom out a bit and take your photo waist-up, a hand on a hip can create a nice slimming gap between your arm and your side with your elbow sticking out. But even if you are going for a close headshot showing strictly head and shoulders, your elbow position still matters! Take a few photos to see the difference. If your elbows are out to the side and your hands on your hips, you’ll probably notice some wrinkling on the top of your shoulders and a broader look. If your elbows hang straight down at your sides, the wrinkles will straighten. Now, try slightly twisting your arms, and pushing your elbows against your sides. This will create a narrow look for your shoulders. There is no right or wrong way. But be intentional about finding the look that works best for you. Pay attention to the difference in shoulder shape depending on how you have your elbows posed.
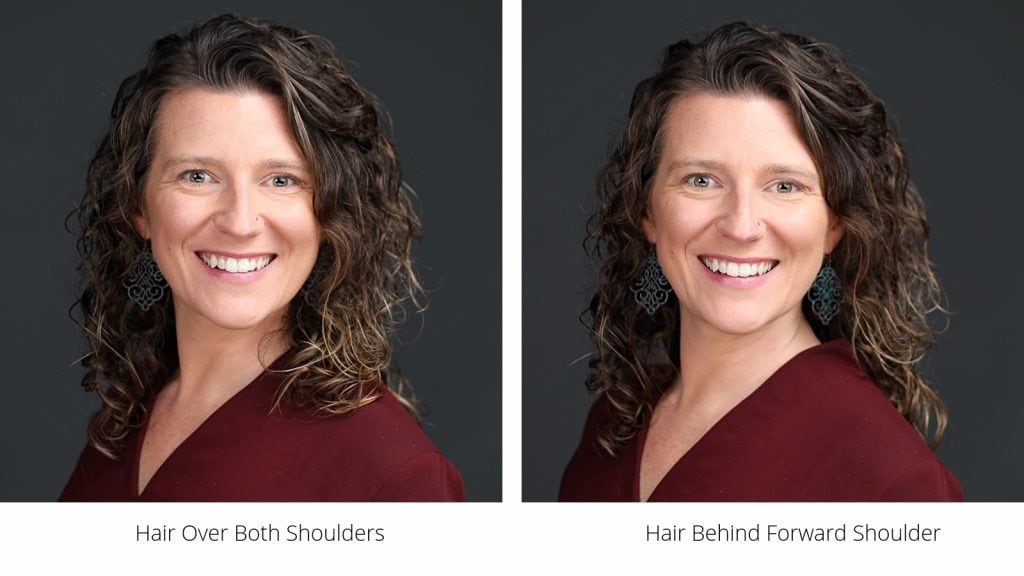
How to position medium- to long-length hair for headshots
Hair makes a difference in your headshot! When it is long enough to go beyond your shoulders, pay attention to where it lies. Move it off the top of your shoulders. One approach is to split your hair on each side so that it lies behind and in front of your shoulders, but not on top. When hair is on the top of the shoulder, it can stick out and up in all sorts of funny ways. Another great option is to move the hair behind your shoulder on the side facing forward toward the camera to open up your face (and to show off your earrings!)
Headshot posing makes a difference
As you can see, headshot posing is a little more than just pointing your face at the camera. The experts at Berks Headshots have been guiding and coaching people in posing and expression in photos for over a decade, and we hope that this tutorial has been able to help as you prepare for your headshot. If it seems too complicated, or you’d like a practiced eye to help you, contact Berks Headshots for a headshot session today!