With the rise of social media and the need for everyone to have a good headshot, DIY headshot photo editing has become a popular option for many people. There are several different ways to edit your own headshot, and with a little bit of practice, anyone can do it.
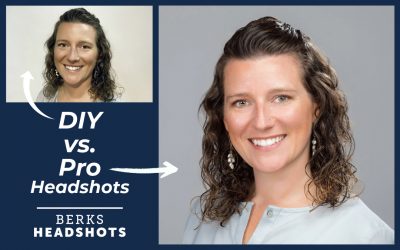
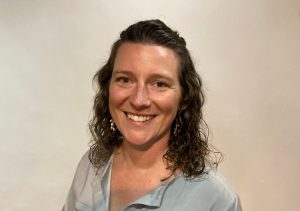
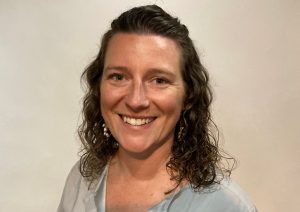
Before & After DIY Headshot in 7 Steps (learn how below!)

The basics of DIY headshot photo editing
There are a few things to keep in mind when editing your own headshot. First, you need an editing app or program. In the studio here at Berks Headshots, we use Adobe’s professional photo editing programs—Lightroom and Photoshop—for most of the work we do (scroll down to the bottom of this post to see an image edited with professional programs). They are great programs, but to get all the features, they aren’t free. And, what they can do is so in-depth, that they can be complicated to learn. In college, my Photoshop textbook alone was almost 3 inches thick!
So, for this DIY editing guide, I’m going to walk you through basic headshot edits with a program called BeFunky that you can use online or as an app on iPhone or Android. Every tool I will demonstrate here is included in the free version. These 7 steps will take your DIY headshot to the next level. We’re going to crop, rotate, color correct, fix exposure, smooth skin, fix blemishes, and whiten teeth.
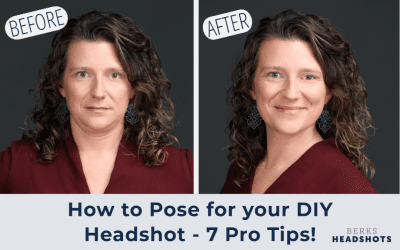
Here is a quick photo I took of myself with my iPhone SE to use as an example:
1. How to Crop your DIY Headshot
When you crop your headshot, make sure you are eliminating any unnecessary parts of the background, and zooming in to include only as much of the pose and outfit as needed. Simpler is better. You want the viewer to be drawn into your expression, so remove distractions. Let them connect with you! One more tip: don’t feel like you have to center your head in the photo. Often placing your head to the right third of the photo, or the left third of the photo can be a more interesting placement. Make sure you leave more space on the side of the photo where your head is turned toward.
2. How to Rotate your DIY Headshot
Next, experiment with the rotate tool. You might like to add a little tilt or to straighten things up if they are a little off-kilter. In my photo, I chose to straighten the photo.
3. How to Color Correct your DIY Headshot
The next tool can really bring your photo to life—Color. Within the Color tool, first use the Hue slider to move back and forth between green and magenta. Slide it all the way toward green, then all the way toward magenta so you can see the extremes. Then, keep sliding back and forth until you find that perfect sweet spot where you don’t notice it being too green or too magenta. Next, do the same thing with the Temperature slider (sometimes called warmth in other photo editing programs). With this one, you will be sliding between blue and yellow until you find a balance that is pleasing and that makes your skin tone look true to life.

4. How to Edit Exposure for your DIY Headshot
Under the exposure tool, there are three things to pay attention to. Overall brightness (use the Bright slider for this), how bright the brightest parts of the photo are (use the Highlights tool), and how dark the darkest parts of the photo are (using the shadows slider). Just like with Color, slide each of these sliders back and forth until they hit a sweet spot.

5. How to Smooth Skin on your DIY Headshot
Our rule of thumb we keep in mind here at Berks Headshots is to edit headshots so that you look your best, while still looking like you. That is something to keep in mind with skin smoothing. If you go too far with it, your skin will start looking like plastic. But, take a subtle approach with this tool, and it will diminish some wrinkles without taking away from your authentic look. In the BeFunky program, I’m using for this tutorial, head to the Smoothing tool, and at a subtle level of smoothing. Then, click on the erase tab —and with the eraser at 100%, take the smoothing off anywhere that should be sharp. I recommend removing the smoothing from your eyes, mouth, jewelry, edges of glasses, outfit details, and any area of your hair that looks better sharp.

6. How to Fix Blemishes on your DIY Headshot
The Blemish Fix tool in BeFunky is easy to use. Simply click on a blemish and watch it disappear! For this step, I recommend zooming in on your image so that you can make sure the fix does not leave any funky lines or ghosting around the spot you removed. If it does, try resizing your brush so that it is close to the size of the blemish, and then try clicking again.

7. How to Whiten Teeth for your DIY Headshot
The BeFunky app / online editing program has a tool called Teeth Whiten. This is the last step in enhancing your headshot. Grab that tool and brush those teeth! Pro Tip: the older we get, the yellower it starts to look in the whites of our eyes. So, while you have that Teeth Whiten tool open, use it in the whites of your eyes too, and you’ll take a couple of years off of your look!

The bottom line on DIY headshot photo editing
DIY headshot photo editing is a great option when you are in a pinch. If it feels difficult to get your headshot to look exactly the way you want it to, keep practicing. The beauty of digital editing is that you can start fresh. If it doesn’t turn out right the first time, you can undo all of your edits and go through the 7 steps again—and get a totally different look depending on where you land with all those sliders. If you find a sweet spot as you go through each of the tools—crop, rotate, color, exposure, smoothing, blemish fix, and teeth whiten—you’ll be amazed at the difference in your before and after!
If you’re interested in more DIY headshot tips, check out that category of our blog. We’ll be doing a few more posts coming up, so stay tuned!
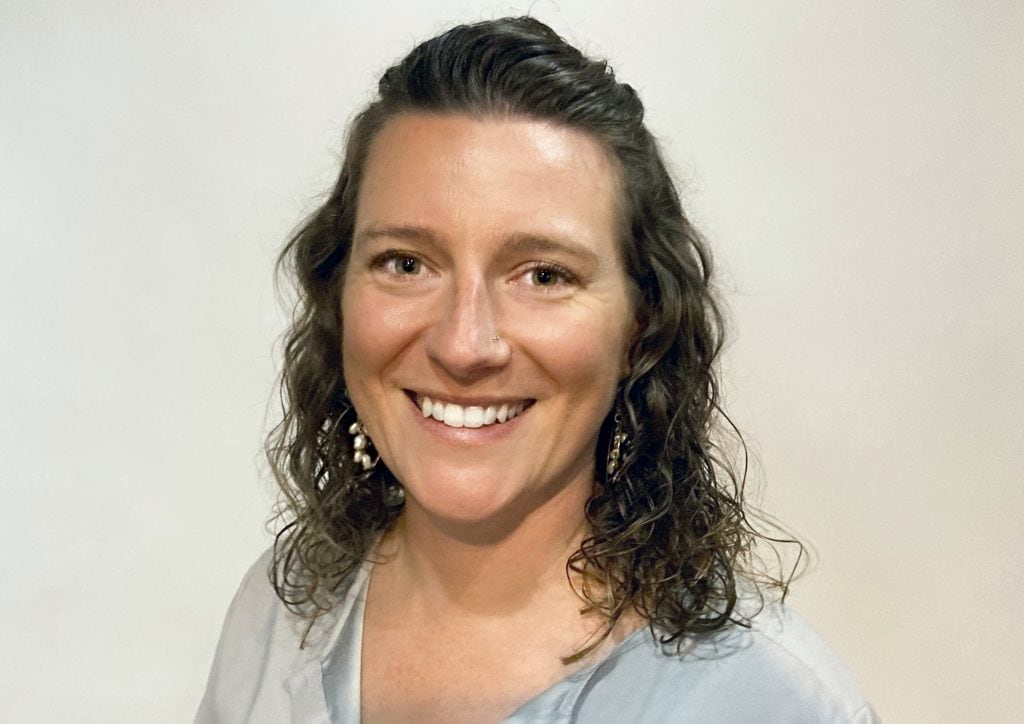
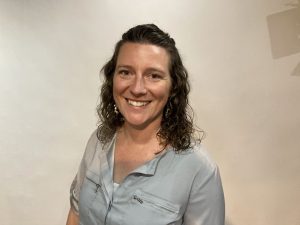
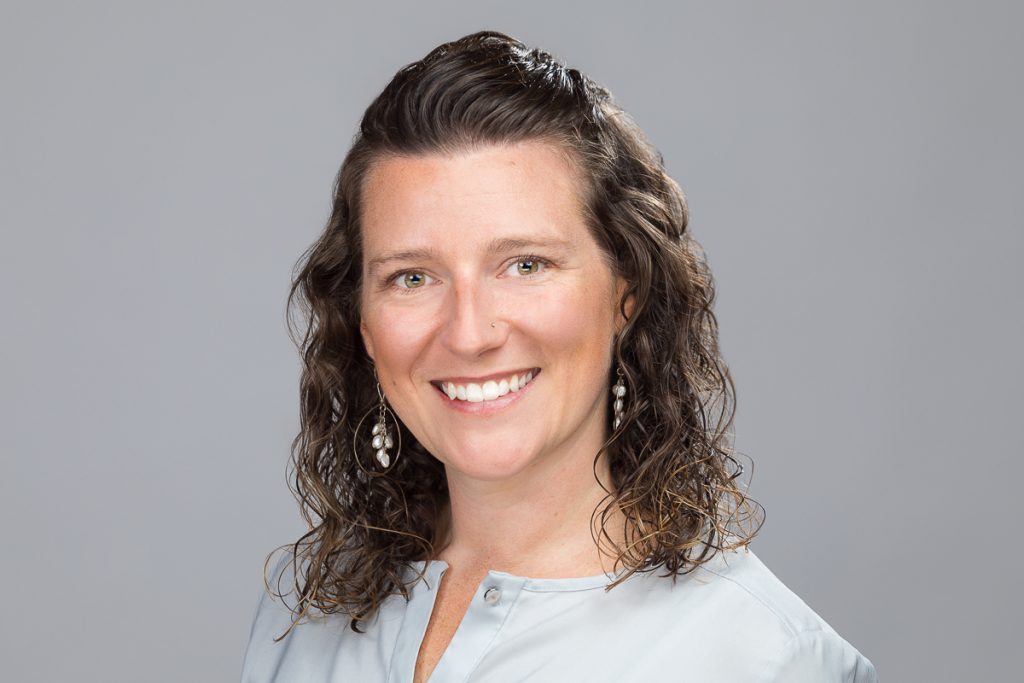
Headshot with Professional Lighting & Editing
If you have the time and are ready to make the investment, I recommend getting your photo taken in the best light and leaving it to a professional. While DIY editing can take your photo to the next level, the sophistication of professional tools and the know-how of a professional will make your photo ten times better. You’ll end up with a photo you are happier to post!
The headshot below was taken within minutes of the photo above, but with a professional camera & lighting, and then was edited with professional software.
Want a headshot with professional-level editing and retouching?
Reach out to our studio to schedule your session today!